
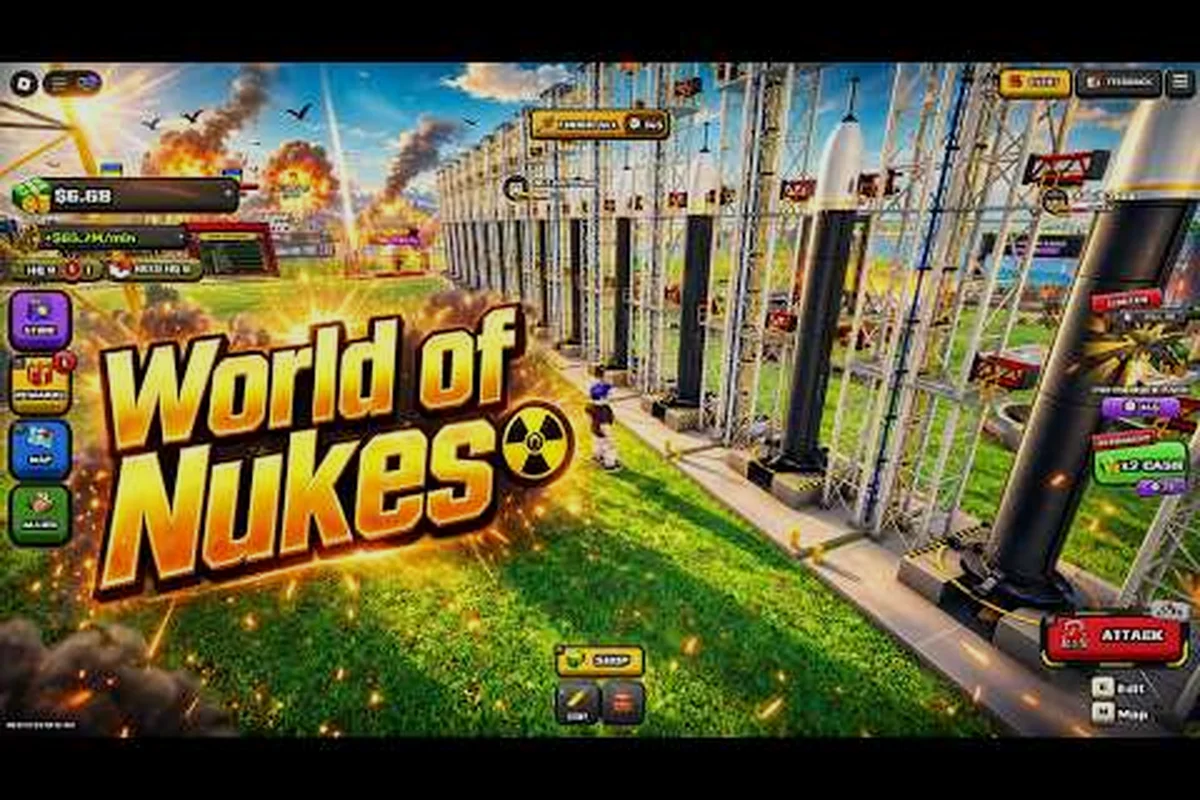
A World of Nukes nuke launch guide only matters once you understand that nukes sit at the very end of the arsenal — they are launched from your island at distant enemies, and nothing about that process is instant. The unlock path runs through wonders first, and the Doomsday Device waits beyond them as the final milestone, which means every launch you fire is the payoff of a long build order rather than a lucky early grab.
This breakdown walks through the wonder chain, the warhead choices, and the timing decisions that separate a wasted missile from a strike that actually reshapes the map. Get the order right and your first launch stops being a novelty and starts being a win condition.
Why the Wonder Chain Comes Before Any Launch
The single most common mistake new players make is treating nukes as a mid-game toy. According to the official World of Nukes page on Roblox, nukes are positioned at the far end of the arsenal, and the unlock order is community-reported because the developers have never published exact requirements. That gap between official silence and player testing is exactly why a structured approach beats guesswork.
Wonders are the gate. You cannot skip them, and you cannot brute-force past them with raw resources alone. Each wonder you complete pushes your island's capability forward and moves the Doomsday Device one step closer to becoming buildable. Players who rush toward launch buttons without finishing the wonder chain usually end up with a stockpile they cannot fire.
Here is the practical shape of the progression as reported by the community: early game is spent stabilizing core island economy and defenses so resource income does not stall, mid game converts that income into your first wonders, and late game is where the remaining wonders unlock the nuke-related infrastructure the Doomsday Device depends on. The sequencing matters because each wonder's output feeds the next tier — skipping a mid-tier wonder to bank resources for the endgame leaves you without the storage and advanced structures needed to even hold Doomsday Device components, which is why players who follow the wonder order report reaching the launch milestone faster than those who hoard first and build wonders last.
| Stage | What You Are Building | What It Unlocks |
|---|---|---|
| Early | Core island economy and defenses | Stable resource income |
| Mid | First wonders | Advanced structures and storage |
| Late | Remaining wonders | Nuke-related infrastructure |
| Endgame | Doomsday Device | The final launch milestone |
The takeaway is blunt: every wonder you skip is a delay on your first launch. Treat the wonder list as a checklist, not a menu. Concretely, that means working the wonders in tier order rather than cherry-picking the ones whose rewards look flashiest — a skipped mid-tier wonder is not just one missing structure, it is the storage capacity and advanced infrastructure the Doomsday Device components physically require, so you end up re-farming resources you already spent while your launch timer stalls. Community-reported progression backs this up: players who complete wonders in sequence consistently reach the launch milestone ahead of players who bank resources first and build wonders last, because each wonder's output compounds into the next tier instead of sitting idle in a stockpile.
How Wonders Actually Gate Your Progress
Wonders function as milestone buildings. You invest resources into them, they complete, and the completion state unlocks the next tier of what your island can construct. Because the exact requirements are not officially documented, the reliable approach is to work through them in the order the community has mapped out rather than picking whichever one looks cheapest.
A second detail matters here: wonders are not purely decorative prestige. Their completion state feeds into the same progression track that eventually makes nuclear infrastructure available. That is why a World of Nukes wonder guide is really a nuke guide in disguise — the two systems are the same ladder viewed from different rungs.
The Full Wonder Progression and What Each One Gives You
Because there is no official published requirements table, the World of Nukes all wonders picture is assembled from player testing and shared experience. The consistent finding across community reports is that wonders form a sequence, and completing them out of order tends to stall rather than accelerate your progress.
The table below summarizes the practical role each wonder plays in a typical run, mapping each tier to its payoff so you can plan a build order before committing resources. Because the World of Nukes all wonders sequence gates later entries, a wonder skipped early can leave you locked out of the Advanced tier that unlocks nuke-capable structures. Exact costs shift with balance patches, so treat the values as directional rather than fixed: the Foundation-tier income and storage wonders come first, production wonders compound your build speed, and the Doomsday Device sits at the end as the launch milestone.
| Wonder | Primary Role | Priority for Nuke Players |
|---|---|---|
| Foundation-tier wonders | Establish income and storage | High — do these first |
| Production wonders | Boost build speed and output | High — compounds over time |
| Defensive wonders | Protect your island from raids | Medium — depends on server |
| Advanced wonders | Unlock late-tier structures | Critical — required for nukes |
| Doomsday Device | Final milestone | Maximum — this is the goal |
The pattern that emerges is that production and advanced wonders carry the most weight for anyone chasing a launch. Defensive wonders matter more on busy servers where rival islands actively probe for weakness, but on quieter servers you can defer them slightly without much risk.
Reading the Wonder List Without Official Numbers
Since the developers have not published a requirements sheet, the World of Nukes wonders list you work from is inherently community-sourced. That means two habits keep you accurate: verify against recent player reports rather than year-old videos, and expect small shifts after each update.
The official developer group page is worth following for patch announcements, since balance changes to wonder costs are the most common reason an old guide goes stale. Joining the group and liking the game also grants free rewards according to the official description, which is a small but free head start on your resource stockpile.
Choosing Your Warhead Before You Launch
Once the wonder chain is done, the launch itself becomes a decision problem rather than a build problem. The warhead you pick determines what the strike is actually for, and picking the biggest option by default is a classic beginner error.
Different warheads serve different strategic purposes. A large warhead on a hardened target wastes potential if the enemy has dispersed their key structures, while a smaller, well-placed strike on a cluster of production buildings can cripple an opponent's rebuild speed far more efficiently.
| Warhead Approach | Best Against | Main Tradeoff |
|---|---|---|
| Heavy single strike | Concentrated bases | Obvious, easy to retaliate against |
| Multiple lighter strikes | Spread-out islands | Requires more launches and resources |
| Precision on production | Rebuilding opponents | Less visual damage, more economic pain |
| Area saturation | Dense defensive clusters | Expensive and slow to assemble |
The core World of Nukes nuke strategy insight is that damage numbers matter less than what you destroy. Knocking out a player's production chain forces a longer recovery than flattening an empty corner of their island. Before you commit a launch, scout the target and identify what they cannot easily replace.
Matching Warhead to Target
Ask one question before every launch: what does this player need to keep functioning? If the answer is a specific cluster of buildings, aim there. If their base is spread across the island, a single massive warhead will underperform and you should consider a different approach entirely.
This is also where the broader weapons guide for World of Nukes earns its place in your reading list, because missiles, jets, and warships all interact with the same targeting logic. A nuke is the loudest tool in the box, but it is rarely the only one you should be using in a single engagement.
Timing a Launch So It Actually Lands
Timing is where most launches fail. A nuke that arrives while the target is offline and their base is idle still does damage, but a nuke that lands mid-rebuild, right after they have committed resources to a new structure, does far more. The difference is entirely about reading the moment.
Three timing signals are worth watching: the rebuild window right after a target finishes a major structure (their resources are drained and the rebuild timer is ticking), the defensive gap created when their attention is pinned on an active raid against another island, and the retaliation cycle that follows any hit you take — anticipate the counter-launch and have your own defenses staged before you fire back. Reading these three beats is what separates a nuke that merely lands from one that actually cripples a base.
-
Rebuild windows — strike shortly after a target completes a major build, when their resources are drained.
-
Defensive gaps — launch when their attention is elsewhere, such as during an active raid on another island.
-
Retaliation cycles — after you take a hit, expect a counter-launch and prepare your own defenses before firing back.
The broader nuke mechanics breakdown covers how launch behavior and unlock order interact, which is useful context for understanding why some launches feel delayed. Community reports suggest launch responsiveness can vary with server load, so build in a small buffer rather than assuming an instant impact.
Reading Opponent Behavior
Experienced players telegraph their rebuild cycles. If you watch an island for a few minutes and see fresh construction appear, you know their resource stock just took a hit. That is your window. Firing into that moment converts a single warhead into several minutes of forced recovery for the opponent.
Conversely, launching at a fully stocked, fully defended island is usually a waste. You spend the warhead, they absorb it, and they rebuild faster than you can reload. A maxed-out defense grid paired with a Wonder like the Missile Silo or Shield Generator can shrug off a single strike entirely, meaning your launch cooldown ticks away while their production queues keep running untouched. Patience here is not passive — it is the whole skill. Rather than dumping a nuke the instant it finishes building, hold it until your scout confirms depleted stockpiles or a gap in their defense coverage, then convert that one warhead into a decisive hit instead of feeding their rebuild cycle.
Building a Launch-Ready Island
A launch is only as good as the island that supports it. If your own base is fragile, the retaliation after your first strike will undo everything you gained. The World of Nukes nuke launch guide therefore has to include the defensive half of the equation, not just the offensive one.
Prioritize these build priorities as you approach the endgame: lock in resource production first, since every warhead, silo upgrade, and launch sequence is gated behind steady income, then expand storage capacity so you can bank enough stockpile for a coordinated multi-warhead strike rather than firing piecemeal. Only after those two are stable should you invest in defensive coverage, because a counter-launch arriving mid-build will stall your nuke infrastructure before the silo ever comes online. Treat redundancy as a late-game priority rather than an afterthought — duplicating your silo and production chain across separate island tiles is what keeps your launch capability alive after a direct hit.
| Priority | Structure Type | Why It Matters |
|---|---|---|
| 1 | Resource production | Funds every subsequent launch |
| 2 | Storage capacity | Lets you bank for a big strike |
| 3 | Defensive coverage | Survives the counter-launch |
| 4 | Nuke infrastructure | Enables the launch itself |
| 5 | Redundancy | Keeps you functioning after a hit |
Redundancy is the one most players ignore. Spreading critical structures across your island means a single enemy warhead cannot decapitate your economy. The players who survive long campaigns are the ones whose bases look slightly inefficient but keep producing after taking a direct hit.
The Doomsday Device as the Endgame Target
The Doomsday Device sits beyond the wonders as the final milestone, and it is the reason the whole chain exists. Reaching it is not a matter of one clever trick but of completing the wonder sequence and then committing resources to the final build. The Doomsday Device and wonder rewards breakdown explains what the endgame actually pays out, which is worth reading before you sink everything into the final push.
Once the device is built, your island shifts from a participant in the nuclear exchange to a dominant threat. That status draws attention, so the defensive priorities above stop being optional and become the thing that keeps your endgame intact.
Frequently Asked Questions
Do I need to finish every wonder before I can launch a nuke?
Community reports indicate the wonder chain gates nuke access, so skipping wonders delays your first launch rather than saving time. Because exact requirements are not officially published, work through the sequence in the community-mapped order and expect small shifts after balance patches.
What is the best wonder to prioritize first?
Production-focused wonders generally pay off fastest because their output compounds across the whole run: a wonder that boosts building or unit output early effectively "pays rent" on every subsequent build, so the earlier it lands the more total value it returns before your first launch. Foundation-tier wonders come first to establish income, then production wonders, with defensive wonders deferred on quieter servers where raids are less frequent. On busier servers, though, that ordering flips — a defensive wonder that protects your stockpile from a raid can outperform a production wonder that never gets to finish, so check your server's raid frequency before committing the build queue.
How do I choose between one big warhead and several smaller ones?
Match the warhead to the target's layout. Concentrated bases reward a heavy single strike, while spread-out islands punish it. The stronger play is usually to identify what the opponent cannot easily replace and aim there rather than maximizing raw damage.
Why did my launch seem to do less damage than expected?
Damage depends heavily on what you hit, not just the warhead size. Striking an empty or already-rebuilt area wastes the shot. Scouting first and firing during a rebuild window converts the same warhead into far more lasting economic damage.
Is the Doomsday Device worth the resource investment?
It is the final milestone beyond the wonders, so it represents the endgame payoff of the entire progression track. Whether it is worth it depends on how long your campaign runs, but for players committed to a full run it is the natural conclusion of the wonder chain.
The whole path from first wonder to final launch is a sequence of small, correct decisions: complete the chain in order, pick a warhead that matches the target, fire during a rebuild window, and keep your own island redundant enough to survive the answer. Get those four habits right and the World of Nukes nuke launch guide stops being a checklist and becomes a way of playing.